How to Create a DAFNI Ready Model
In the world of DAFNI, a Model represents user provided code that can take inputs and produce outputs. The code that is provided is anticipated to perform functions such as forecasting traffic flows based on proposed new road routes and growth profiles of the number of vehicles using those routes. One aim of DAFNI is to support connecting Models together such that the output of one can be used as an input to another e.g. a separate Model could forecast the number of vehicles using the routes in the aforementioned traffic model.
To enable the running of Models on DAFNI and enable this level of interconnectivity between Models, it is necessary to have a defined set of standards that a Model must conform to. This guide aims to introduce you to these standards to allow you to start developing a new Model for the DAFNI platform or update an existing Model to run on DAFNI.
Containerising Your Model
The DAFNI platform runs Models as Docker containers. This enables the running of the Models as isolated packages complete with all the code and libraries they need to run contained inside of them. Therefore, DAFNI doesn't need to try to support every possible combination of programming language version and library version available or, conversely, restrict the Model developers to a very limited subset of these languages and libraries. This has two large impacts on the Model developers:
- They gain a large amount of freedom over languages and libraries they use to develop their Models.
- They need to have access to and know how to use Docker.
If you think this sounds like it might create a lot of work for you, our Trivial Containerisation Example below may reassure you. If you would like to take a deeper dive into Docker and how to use it, a good place to get started might be Docker's Quickstart Guide. You can also have a look at the tips given in the short docker companion guide in these pages.
Trivial Containerisation Example
A prerequisite to being able to containerise a Model is having access to
Docker. To download Docker to run locally on your development machine, visit
Docker's download page. Having Docker installed
and running locally is what allows the use of the docker command used throughout this
example.
Context
DAFNI has created some example Models (available in the example Models repository) to demonstrate how building and uploading a Model works. In this example, I will be working with the Fibonacci Model from the example Models repository. Feel free to clone the repository and follow along with the examples in this guide.
The Fibonacci Model has the following directory structure (ignoring the extra files needed to upload the Model to DAFNI).
simple-example--fibonacci-model/
    src/
        main.py
        work.py
    README.md
Note: The root directory might be named something other than
simple-example--fibonacci-modeldepending on how you cloned the repository. For the purposes of this document, I will usesimple-example--fibonacci-modelas the name of the root directory of the Model, but please change this as appropriate for you.
The simple-example--fibonacci-model/src/ directory contains the source code for the
Model and the README.md is the readme file displayed when you view the
repository on GitHub (or other host).
The following command runs the Model when executed from within the
simple-example--fibonacci-model directory.
python src/main.py
Containerisation
Given the information presented above, how do we go about containerising the Fibonacci
Model? It turns out, rather easily. First we need a Dockerfile. This provides
Docker a list of instructions it needs to follow to produce a containerised piece of
software. A Dockerfile already exists in the fibonacci-example directory which gives
the following directory structure.
simple-example--fibonacci-model/
    src/
        main.py
        work.py
    README.md
    Dockerfile
The contents of the Dockerfile are shown below. File paths for local files are writen
relative to the simple-example--fibonacci-model directory.
# simple-example--fibonacci-model/Dockerfile

# Use the official Python 3.8 image from Dockerhub to provide a Python environment
FROM python:3.8

# Copy the contents from the local ./src/ directory to the output container's /src/ directory
COPY ./src /src

# Tell Docker how to run the Model when it starts the container.
CMD ["python", "/src/main.py"]
Because of the way the COPY command has been used, the container's directory structure
will be the following. The important thing to note is the contents of the
simple-example--fibonacci-model/src has been copied to the /src/ directory.
/src/
    main.py
    work.py
[other system files]
Now we have the Dockerfile, we just need to use it to build our container which is done
by running the following command from within the simple-example--fibonacci-model
directory. Note the trailing . in the command, which tells Docker to run the build in
the current directory.
docker build -t fibonacci-model .
This command automatically looks for a file called Dockerfile in the directory the
build is run in, hence we haven't supplied its name here. The -t fibonacci-model
will name the image that is built fibonacci-model. If you now run docker images you
should see fibonacci-model listed.
When you upload a model to DAFNI, you will need a file that contains the docker image. This can easily be obtained using the following command, which saves the docker image as a tarfile.
docker save -o fibonacci-model.tar fibonacci-model
You can now gzip the tarfile to create a compressed archive file (fibonacci-model.tar.gz) that can be uploaded to DAFNI.
gzip fibonacci-model.tar
If you are working on a Windows computer this step can be carried out using the program 7-Zip, or a similar program.
Model Base Images
In the Trivial Containerisation Example we were
working with the Fibonacci Example Model. At the top of the Dockerfile for
the model (shown below), we have specified that the Model container should be
built from the official python:3.8 image from
Dockerhub (a Docker registry housing many
official language images). Building the Fibonacci Model from the python:3.8
image provides an environment to run our Model code in that contains Python
3.8 and other necessary Python dependencies.
# Use the official Python 3.8 image from Dockerhub to provide a Python environment
FROM python:3.8
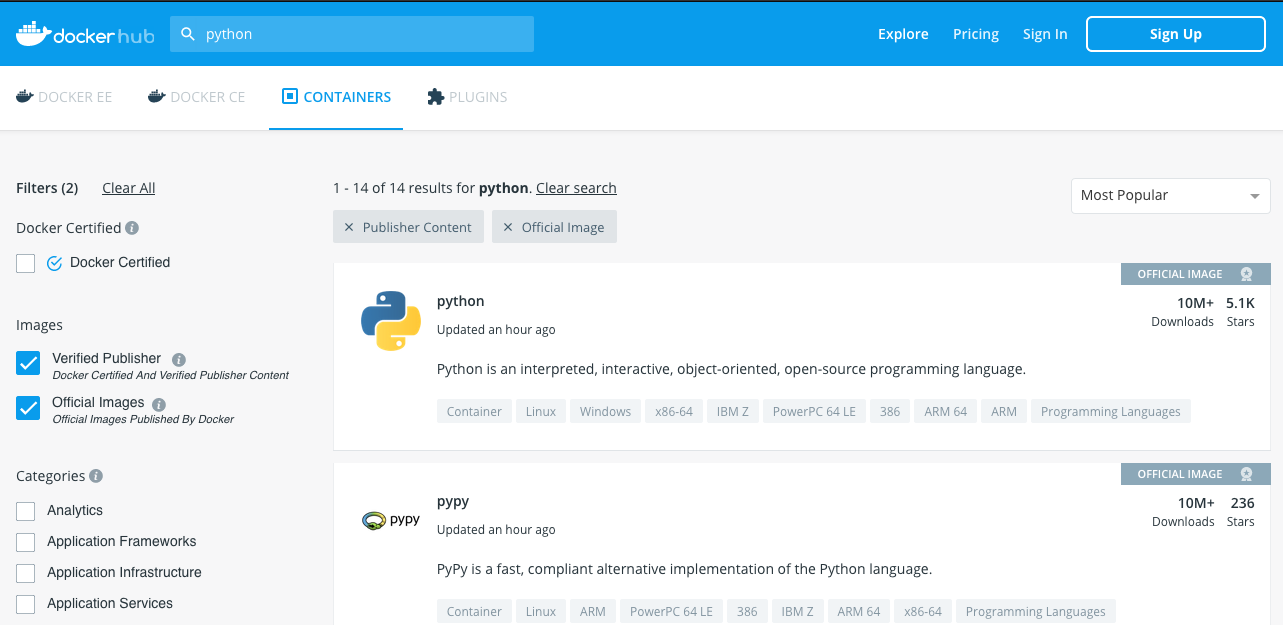
A good starting point when containerising your Model is to build your Model image from one of the official language images from Dockerhub. Going to Dockerhub using the provided link and searching for "python" brings up the official Python image as the top hit. Be sure to check the "Verified Publisher" and "Official Images" filter checkboxes on the left side bar as shown in the following image.
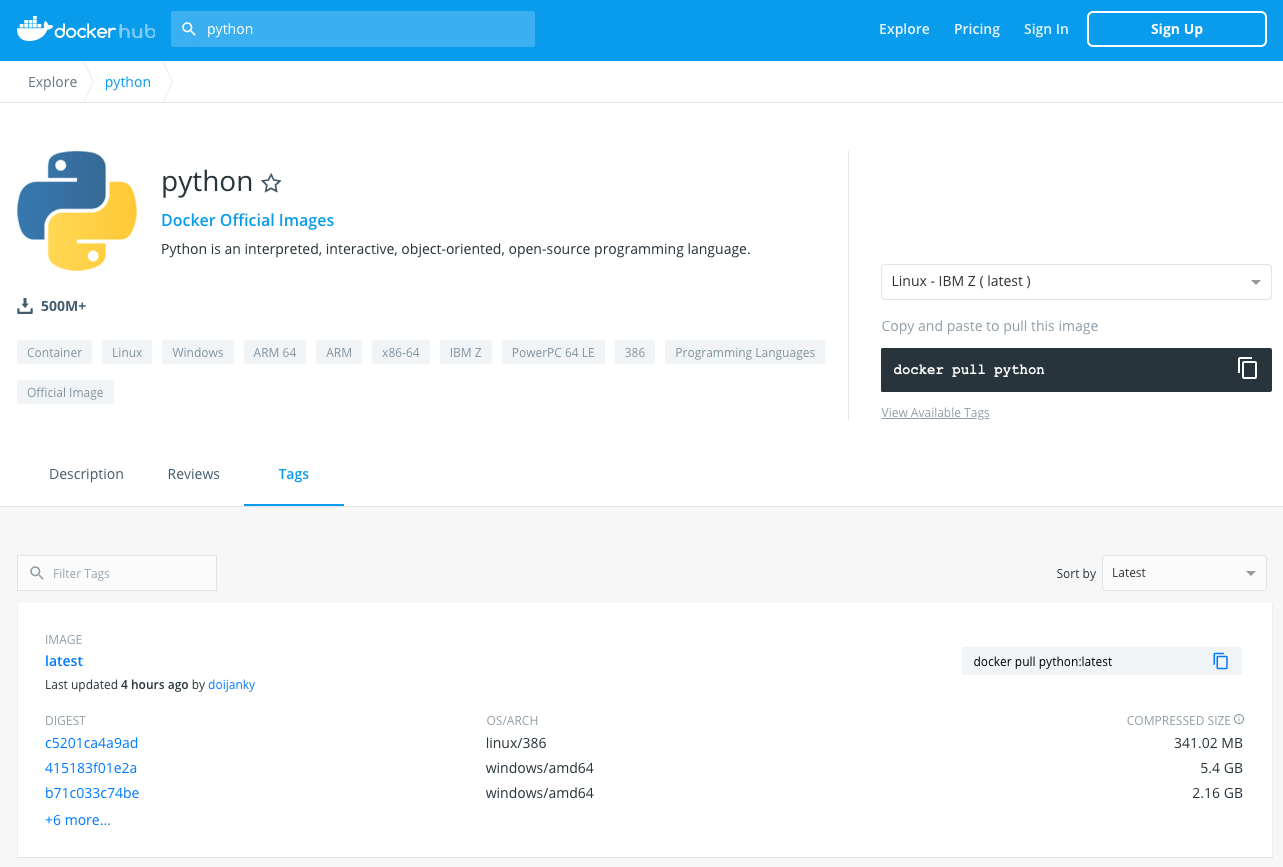
After clicking on the language image you want, you need to click on the "Tags" link so
you can find the image tag you want to build from (the :3.8 of python:3.8). After
clicking on "Tags", you should see a page similar to the following.
Scroll down until you find the tag you want. This will usually be based around the
version of the language contained in the image e.g. 3.8 for Python. You need to find a
fairly specific tag for the version of the language you want. Failing to have a specific
enough language version specified runs the risk of your Model not working in
the future if the language is updated with breaking changes. For example, rather than
specifying that your image should be built from python or python:3, it should
specify python:3.8 as there won't be breaking changes introduced in Python 3.8.X
updates, whereas there might be breaking changes between Python 3.X updates.
Model Inputs and Outputs
DAFNI is designed to enable the running and connection of a wide range of Models, all of which could be written in different programming languages. To make this possible, there needs to be a common interface into and out of a Model.
The inputs and outputs (along with other Model configuration) is provided in
a Model Definition file (see our
How to Write a Model Definition
guide for more information). An example of a Model Definition file can be
seen at simple-example--fibonacci-model/model_definition.yaml.
Inputs
At the time of writing this guide, the supported mechanisms for defining inputs are through environment variables and through retrieval of Datasets from the National Infrastructure Database (NID).
Environment Variables
Environment variables are a simple way of providing outside configuration to a
Model. In the Model Definition file that accompanies your
Model you can define some parameters around each of the environment variables
such as minimum and maximum accepted values, the expected data type of the value, etc.
The Fibonacci Model demonstrates this in
simple-example--fibonacci-model/model_definition.yaml.
Environment variables are a common mechanism to provide configuration to computer programs so there is good support for reading their values in a range of programming languages. For example, in Python one would do the following.
import os

environment_variable_value = os.getenv("ENVIRONMENT_VARIABLE_NAME")
Note: Aim to extract the values of the environment variables in a configuration file/class, not directly on the lines of code where you need the value. In the places you need this value in the code you can then read from the value from the configuration file. This makes the implementation much more flexible i.e. there is only a single place to change if you decide you want to change the name of an environment variable.
Datasets
Datasets provide a means of getting far richer data into your Model. Datasets are retrieved from the NID when a Model runs and are made available at a specified location in the Model's file structure. When creating the Model Definition file that accompanies your Model, you are able to specify Dataslots, containing the Datasets that you would like to be included in your Model and at which the file path you would like them to be made available. There are some restrictions to be aware of when working with Datasets and Dataslots:
- The Dataset(s) in a Dataslot can only be made available at a path
underneath the
inputs/directory e.g.inputs/dataslots/dataslot-onein the Model Definition file. - The Dataset(s) in a Dataslot will be made available at
/data/<path you specify in Dataslot in model definition>i.e. if you specifyinputs/dataslots/dataslot-onein the Model Definition, the Dataset(s) will be available at/data/inputs/dataslots/dataslot-onein the Model. - Datasets are read-only, meaning you cannot update them in place.
To make use of a Dataset, it must be available in the NID. To do this, head
over to the Data Catalogue page in the DAFNI web app. Once there, press the Add data
button. This will take you to a page through which you can create a Dataset
by following the on screen instructions.
Outputs
Datasets
The Model Definition file allows you to specify a list of output Datasets, this list is currently only used as additional metadata to inform users what files your Model outputs. Similar to Datasets as inputs there are some restrictions to be aware of:
- The outputs of your Model must be moved to the
/data/outputs/folder for DAFNI to pick them up, Workflows are one place in which this structure is critical.
Although this list field is not currently required for a valid Model Definition file, it does come in useful when you and others are trying to use your Model in a Workflow. Publish and Visualisation steps require a user to specify a path to the files they want to add to their Dataset or Visualisation, they can use the list you provide to list the specific files they want to introduce.