How to Create a Workflow
To create a Workflow head over to the Workflow Catalogue page. To start click the "Create workflow" button, outlined in orange in the image below.

Creating a Workflow
This will take you to a new page, where you can graphically build up a Workflow using the tools provided (which can be seen in the images below).
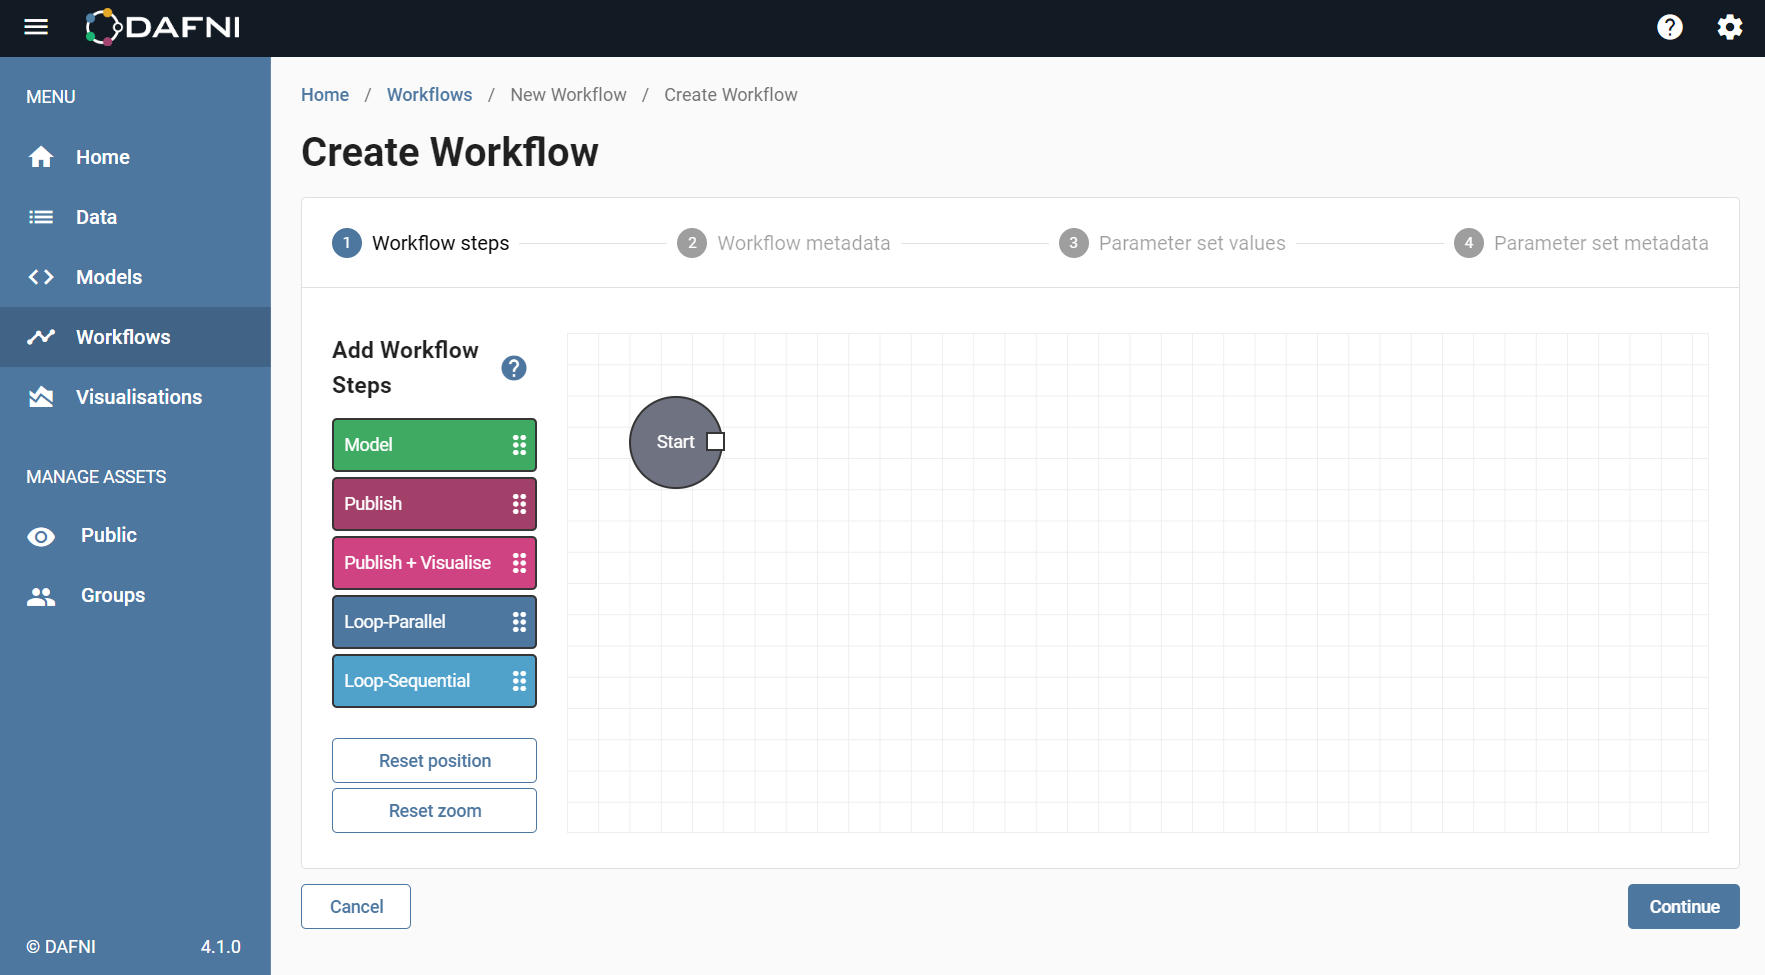
You can easily and quickly build up the workflow using individual workflow elements (or steps), which can be seen on the left side (the coloured boxes under Add Workflow Steps). These boxes can be dragged and dropped onto the central workflow area, and are linked to one another by left clicking on the side of an element, holding the button & dragging it onto another step. When a workflow step is selected & highlighted with the left mouse button, important settings can be edited allowing one to change the name, models among other details.
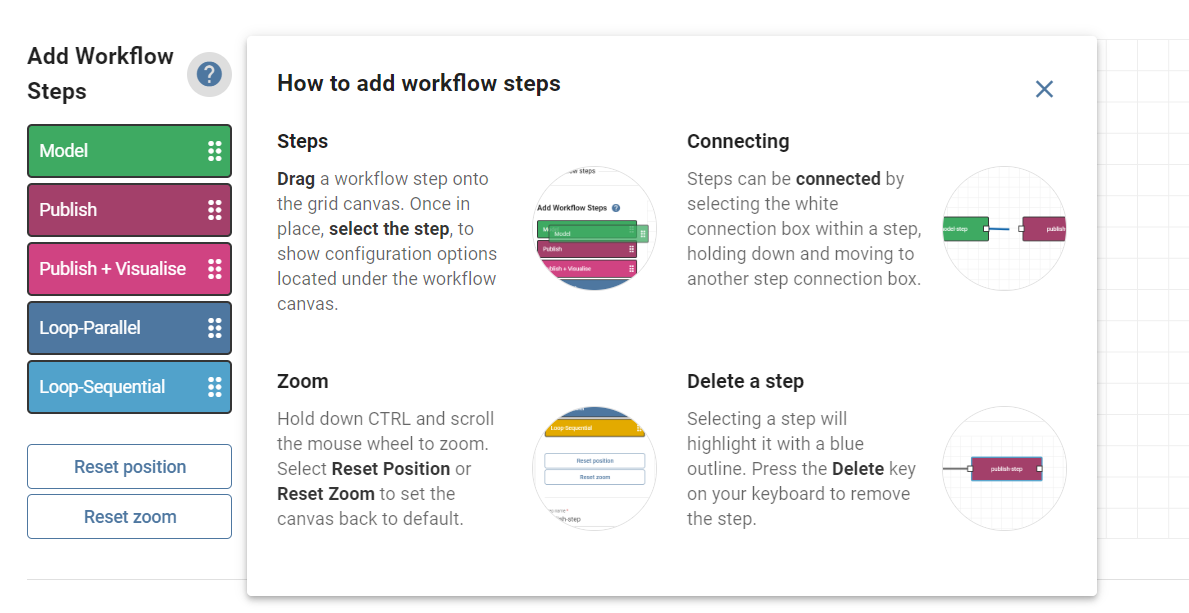
As can been seen in the images there are various step types that can be used in a workflow and we will cover them in detail below.
Workflow Step (or Element) Types
DAFNI currently supports 3 major step types in Workflows. In addition there are also loops, which will be covered in a separate guide. Below we'll cover, in detail, what these step types are and what each of them does.
Model Steps
This is the most important step type for Workflows, for a Workflow to do something it needs a model step. A model step tells the Workflow which Model you want to run and specifically what version of a Model you want to run in your Workflow.
Publisher Steps
These steps take the output data produced by one or more of the model steps in your Workflow, combine it with some metadata that is defined in the step configuration and upload that to DAFNI's Data catalogue.
Publish and Visualisation Steps
This step is very similar to publisher steps, but also automatically creates a visualisation. as well as adding a dataset to DAFNI. This step will create the dataset in the Data catalogue, as in the publish step, and spin up the visualisation automatically for you when the Workflow is executed. It should be noted that visualisations come in two flavours - the drag and drop interface, which can load in csv files, and is used to create straightforward visualisations, and the more powerful Jupyter notebooks (these are more suitable for serious analysis of output data). Both are described in greater detail below.
Creating Steps in Detail
Now that we know how to create an element/step using the drag and drop interface we will cover the information that needs to be entered for each step in the Workflow.

In order to edit the information for a step, it will first need to be selected with a left mouse click on the box (once you are finished, left clicking elsewhere will save the data - eg. clicking just outside of the box).
Model Step
Below the step type, you are asked to give this step a name. The step name must be unique within the Workflow. It is recommended that you enter a step name that tells you what the step will be doing, for example naming it after the Model that will be run in this step. Next, we need to choose the Model that we will run in this step, to do this click the "Select model" button. A dialog box should open up showing the Model catalogue with checkboxes down the left -hand side of the table, check one of these to select your Model and click "Select model" in the bottom right-hand corner of the dialog.
This is the minimum information that is required to create a model
step, the last field, "Steps to include data from" allows you to send the output data from
one model step to the inputs folder of another model step (at the path
/data/inputs/{STEP-NAME} where {STEP-NAME} is the name of the step you are taking data
from). Since this Workflow doesn't have any other model steps yet, the list of
steps you can take data from is empty. Press "Create step" to confirm the creation of your
step and it will be added to the Workflow.
Publisher Step
As with the model step, the first field to fill in is the step name, which serves as an identifier for the step.
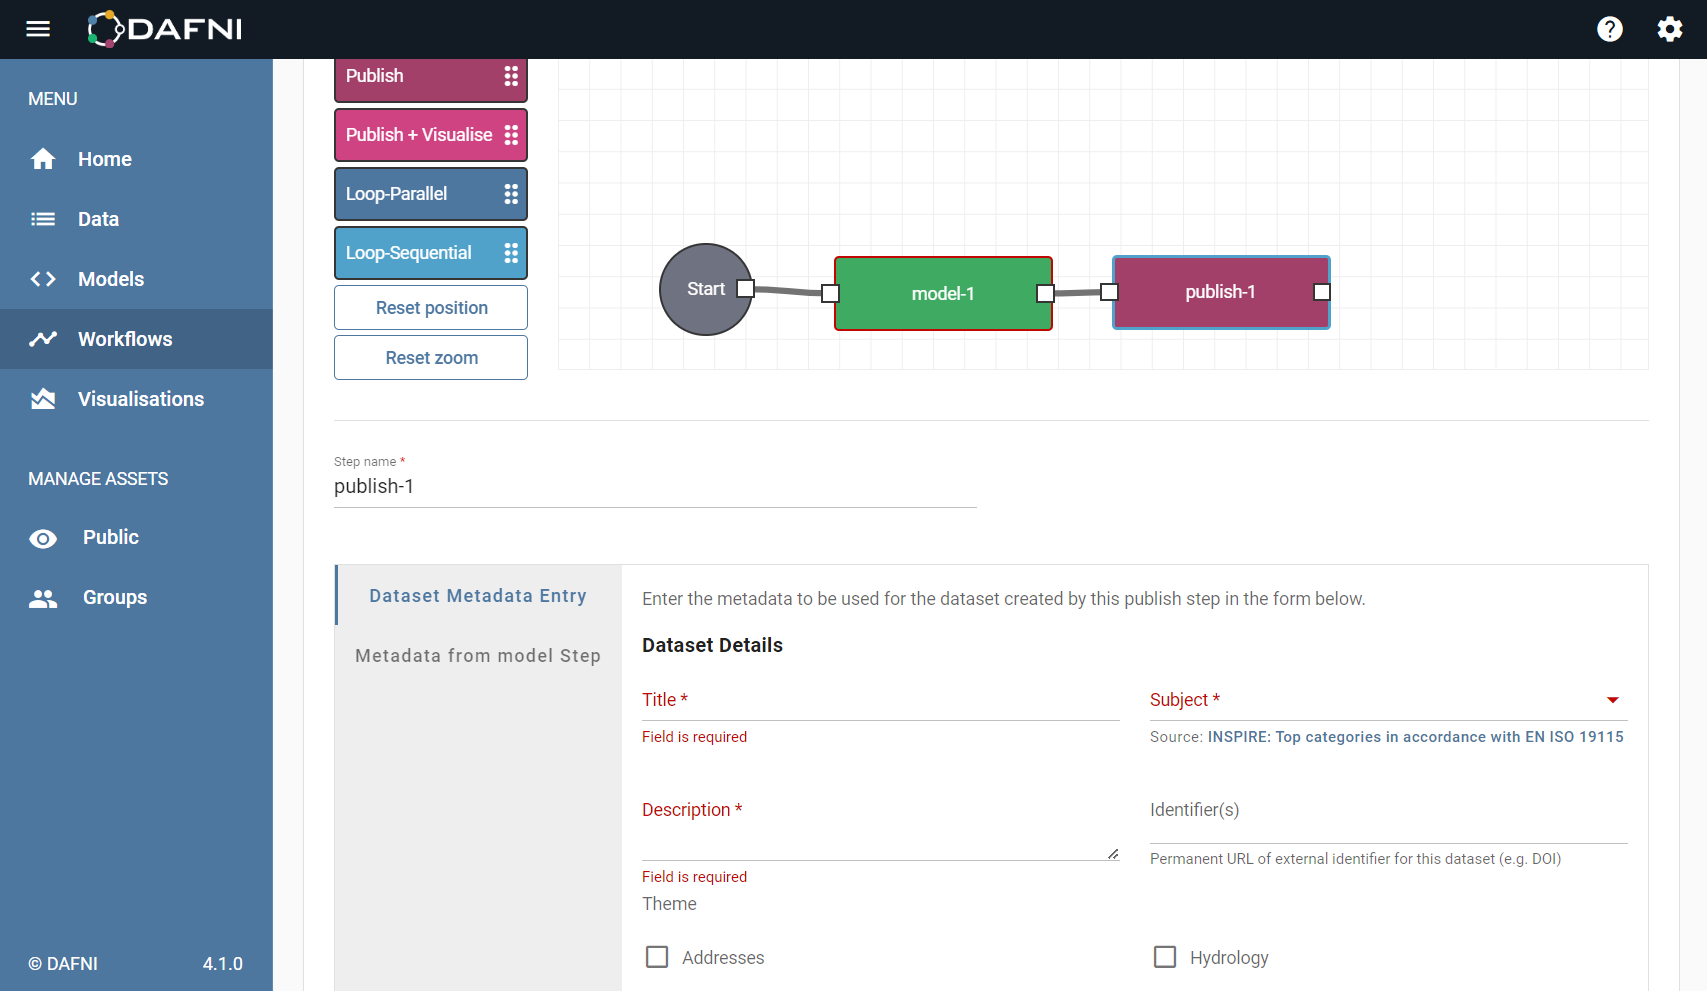
Below the step name, there is a switch that lets you select whether you want to specify the metadata for the dataset that will be produced manually or to include a JSON file from a model step that has the metadata in. Initially, the switch will be turned on and you will be prompted to use a metadata file. You will see two fields to the right of the switch, the first "Step to include metadata from" lets you choose which model step to take the JSON file from. The second "File path" needs a path to the file that is produced by the model step. For now, let's click on the switch to change to the manual metadata entry form that should appear as below.
Note: If you are using a metadata file, the Model, from which the metadata file is generated, must put it into the
/data/outputs/folder or a child folder within that. The field itself automatically adds the/data/prefix so you only need to enter the path from that folder e.g.outputs/metadata.jsonoroutputs/folder/metadata.json.
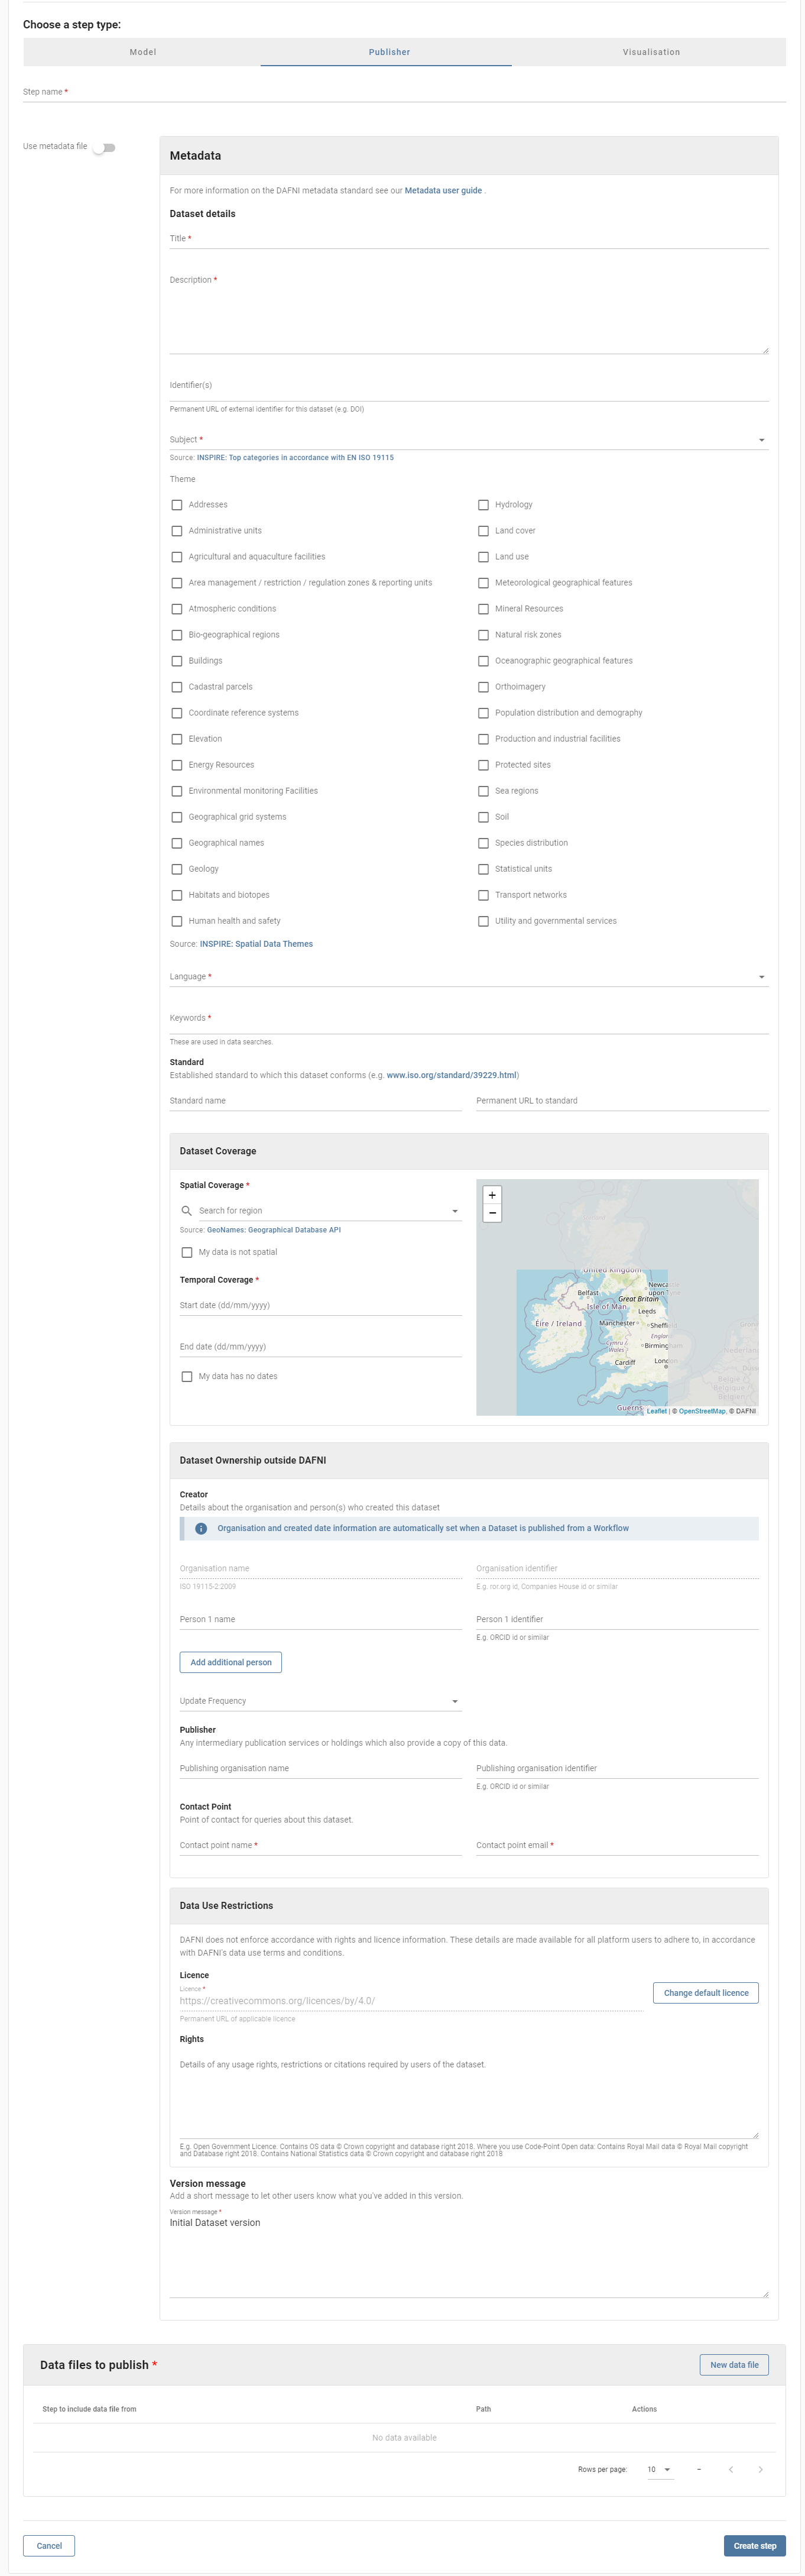
This metadata form is the same as the one shown on dataset upload so it won't be covered in
detail here. A couple of things to note though - the organisation fields are disabled because
they are automatically filled by DAFNI, the organisation name will be filled with
DAFNI Workflows ({WORKFLOW-NAME}) where {WORKFLOW-NAME} will be replaced by the display
name of your Workflow and we will add a link to the Workflow instance
that created the dataset when you execute the Workflow. The creation date for the
dataset will be set to the current time when the dataset gets created too, so that field
is not present in the form.
Below the metadata form is an empty table called "Data files to publish". Here, you select the
files you want to upload as part of the dataset. Click "New data file" to add a new set of
files to upload, this will open a dialog with two fields "Step to include data file from" and
"File path". "Step to include data file from" works the same as the similarly named field
for metadata file selection, choose a model step from the list to choose the step to take
files from. As with the "File path" field for metadata, this takes files from the
/data/outputs/ folder or a child folder within that. It's up to you how verbose you want to
be here, you can either add a new entry into the table for each file you want to include or,
if you want to include an entire folder worth of files, you can do so by using the * wild
card character e.g. outputs/*. This will only grab the files in that folder though, any
child folders will be ignored, to recursively collect files from the folder and all child
folders within it use **/* e.g. outputs/**/*. If you would like to include files from
multiple different model steps you need to add a new entry into the
table for each model step you want to include files from.
Once you have entered all the files you want to publish, if you left click outside the box representing the element/step, the information for this step (of your Workflow) will be saved.
Publish and Visualise Step
As with the other steps, the first field to fill in is the step name (this will be for the publish step). For the visualisation step, this will be name of the visualisation instance. This is the name that will appear in the list of visualisations so you should pick a name that will allow you to easily find it again in the future.
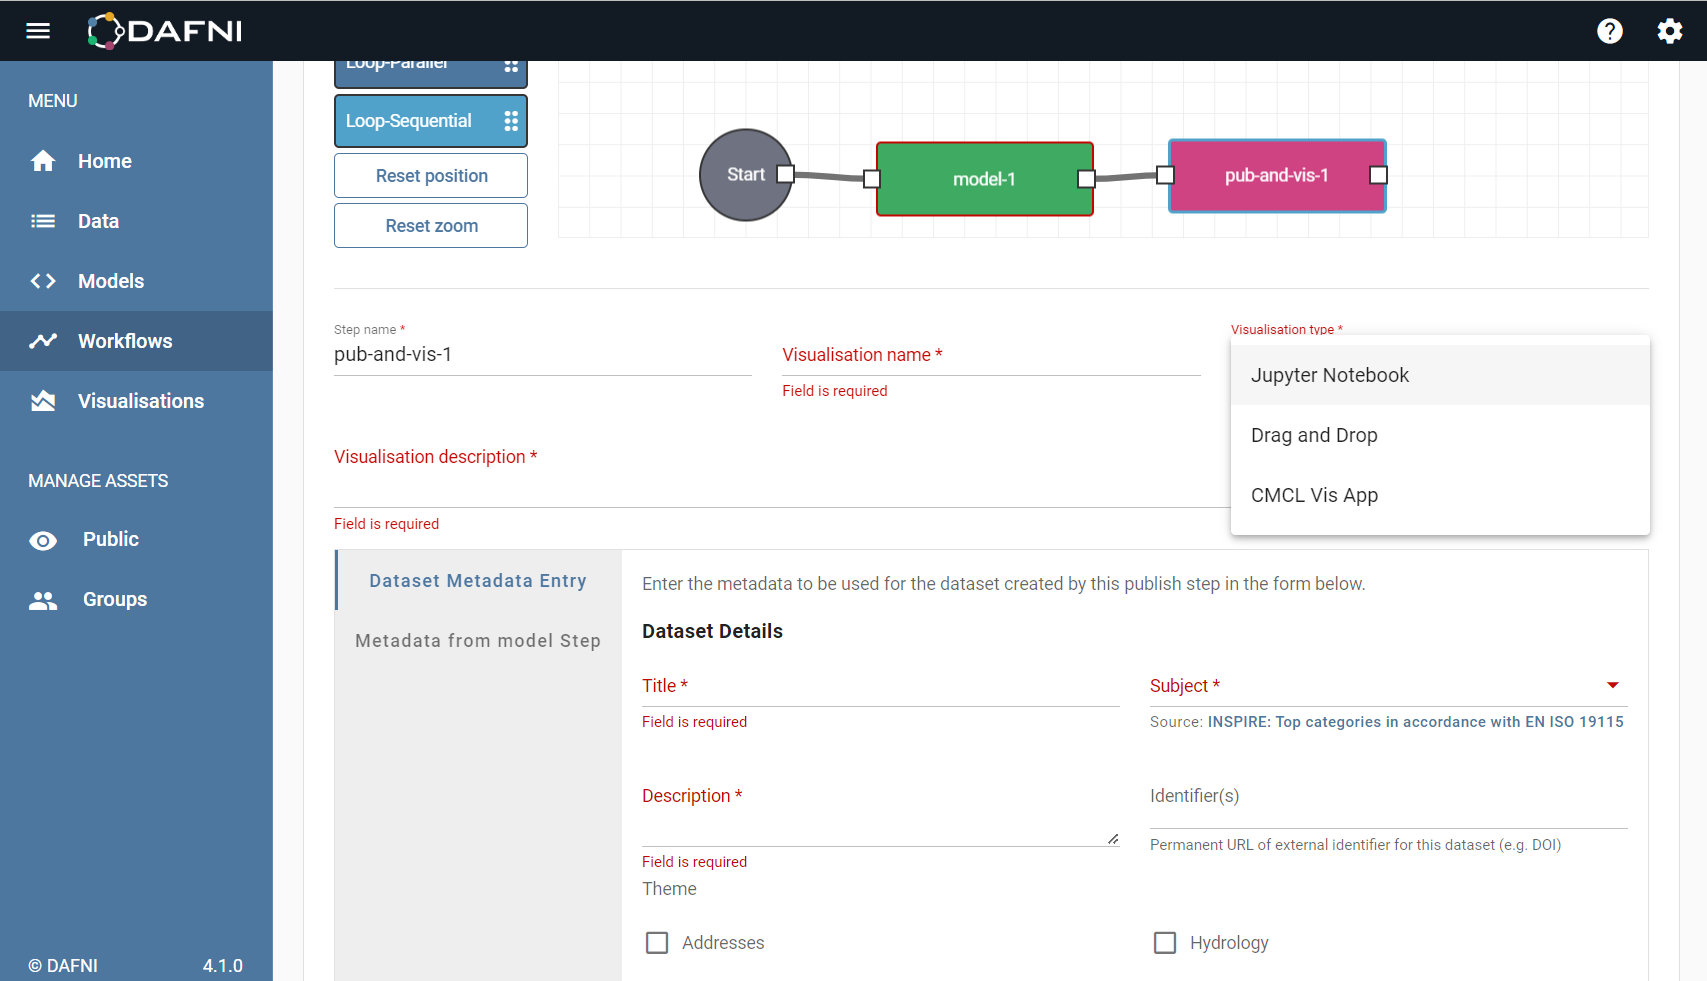
As mentioned earlier, a lot of the configuration of this step is the same as the publisher step because they both currently upload a dataset to the Data catalogue. As such, we won't cover the metadata or "Data files to visualise" here as they work in the same way as with the publisher steps.
There are some additional fields that visualisation steps need though, Visualisation name is one of those. This is the name that will be given to the visualisation that is created by this step, so name it something sensible and relevant. Next, you need to select the Visualisation type. Currently, we support Jupyter Notebooks and Drag and Drop visualisations but in the future, we hope to support more. If you are comfortable with programming in Python/R then you might want to select Jupyter Notebook, if not or if you would rather produce the visualisation using a web tool that we created in collaboration with Oxford University then select Drag and Drop. The final additional field is the Visualisation description, here you can describe exactly what you plan to do in this visualisation - don't worry too much if you're not sure about that now, this can always be updated manually on the visualisation later.
Once you have entered this information, filled in the metadata and selected the files you want to add to your visualisation, click "Create step" to add it to your Workflow.
Editing a Step
If you made a mistake or want to change any of the information you entered into any of the steps that you have already created you can do that by clicking on the step in your Workflow. You should see that the appropriate configuration form is shown below the Workflow, similar to when you first filled it in. The form should be pre-populated with all the information that you previously entered, change any fields that you want to and then left clicking from the step's box to save your changes.
Note: it is not possible to change the type of a step once it has been created (you will have to delete and replace it manually).
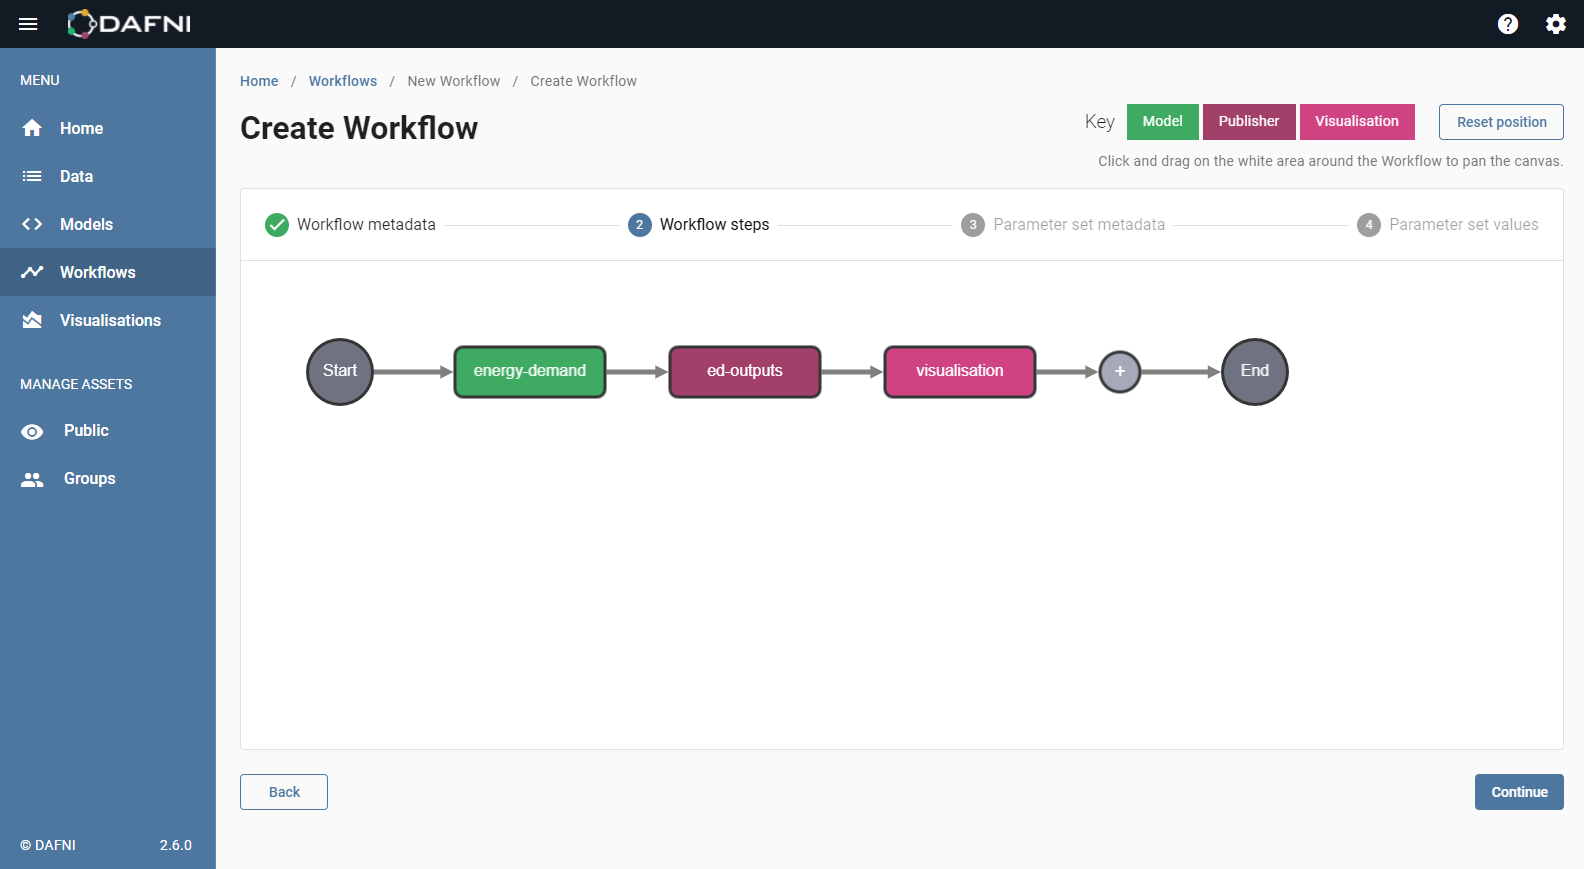
Wrapping Up
You should now have a Workflow that looks something like the image below. Next, we will create the first Parameter Set for your Workflow, so click the "Continue button" and go to How to Create a Parameter Set.