How to Execute the Model in DAFNI
In the previous section, we prepared models to be DAFNI-ready, creating Docker images or tar files alongside their model definition files. These files can now be uploaded and executed on the DAFNI platform. The process involves three main steps:
- Upload the model to DAFNI.
- Create a workflow to execute the model.
- Run the workflow and retrieve the model’s output.
In this guide, we will demonstrate how to upload and execute the Fibonacci Python model on the DAFNI platform.
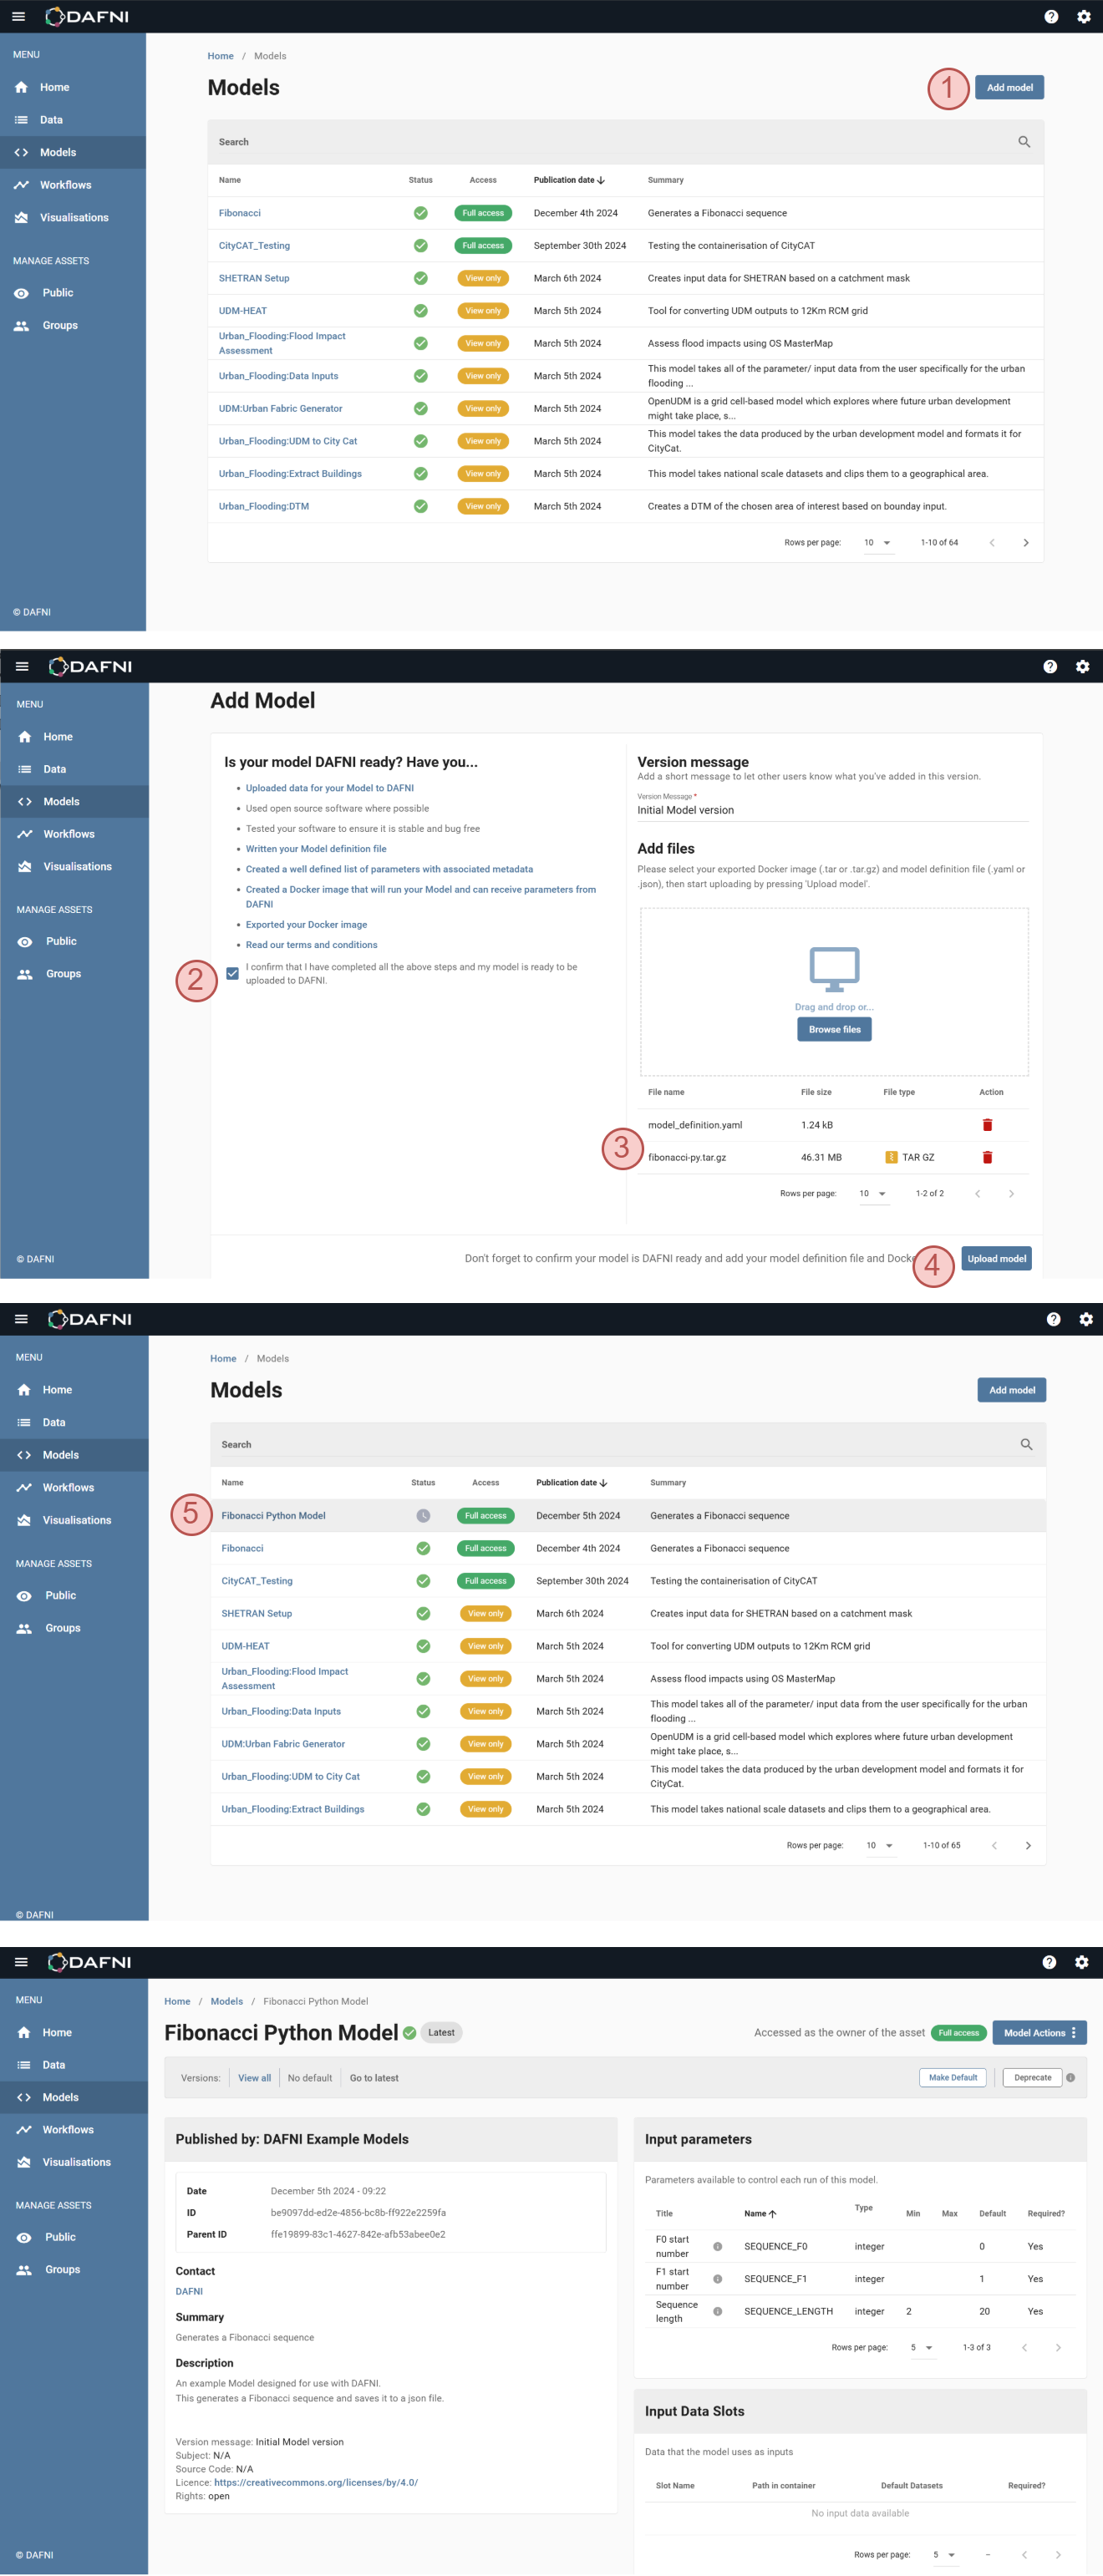
Step 1: Upload the Model
Uploading the model to DAFNI involves importing the Docker image and associated definition files. Summary of upload steps:
- Log in to your DAFNI account.
- Navigate to the Models section.
- Click Add model.
- Attach the tar file containing the Docker image and the
model_definition.yamlfile. - Upload model and wait for the upload process to complete.
The image below illustrates the key steps in this process. For a detailed explanation, please refer to the How to Upload a Model page or the video tutorial on the "Getting Started on DAFNI" page.
Step 2: Create a Workflow
After uploading the model, the next step is to create a workflow to execute it. Workflows allow you to define input parameters, set dependencies, and connect multiple models if required. Summary of workflow creation steps:
- Navigate to the Workflows section.
- Click Create workflow.
- Drag and drop model box.
- Select the model and configure various model parameters.
The image below highlights the steps involved in creating a workflow. Note that certain steps (e.g. Step 8) may require multiple substeps, such as filling out forms or configuring connections. For additional details, see the How to Create a Workflow page or the "Getting Started on DAFNI" video tutorial.

Step 3: Execute the Workflow
Once the workflow is created, you can execute it to run the model. Summary of execution steps:
- Select the workflow you created from the Workflows section.
- Click Execute workflow.
- Monitor the execution status in the Instances section.
- Once the workflow completes, download the output from the Data section.
The image below outlines the steps required to run the workflow and retrieve the output. For detailed instructions, refer to the "Getting Started on DAFNI" video tutorial.
